How to Grow Mint Without It Taking Over Your Garden
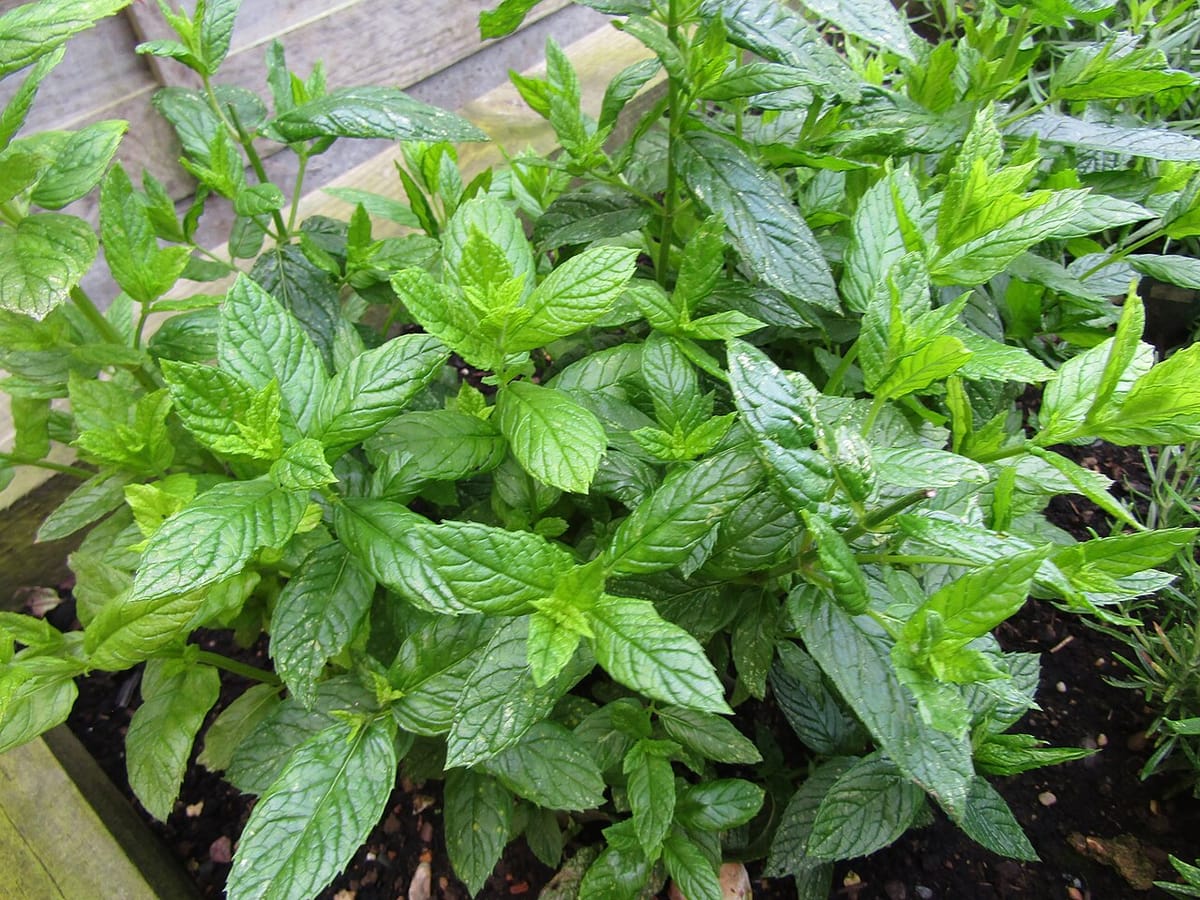
Every experienced gardener has a mint story, and it’s never a happy one. It usually starts with a single innocent transplant, tucked into a sunny corner of the vegetable bed for fresh tea, and ends two summers later with an archaeology project — mint runners discovered threading under the pathway, up through the lawn, and into the neighbor’s yard, with the original plant nowhere near the center of its own colonization anymore. Mint doesn’t grow in a garden. It grows through one.
This isn’t a flaw to breed out or a myth to dismiss — it’s the plant working exactly as evolution built it to. The good news is that containing mint is a completely solved problem once you understand the mechanism, and once contained, mint becomes one of the easiest, most rewarding herbs in the garden: fast, fragrant, nearly impossible to kill, and endlessly useful in the kitchen. This guide covers why it spreads, the container methods that hold it, and how to reclaim ground it’s already taken.
Understand the mechanism: rhizomes, not roots
Most garden plants spread — if they spread at all — slowly, through seed dispersal or a gradually widening clump. Mint spreads through rhizomes: horizontal underground stems that grow outward from the base plant, sending up new independent shoots at intervals along their length (called nodes) and putting down their own roots at each one. A single mint plant, given loose garden soil and a season, can send rhizomes several feet in every direction — and by midsummer, what looks like “more mint” is dozens of technically separate plants, all connected underground.
This explains two things that confuse first-time mint growers. First, why pulling mint by hand often backfires: any rhizome fragment left in the soil — and hand-pulling reliably leaves fragments, since the rhizomes are brittle and extensive — can sprout an entirely new plant from that piece alone. Digging out mint is less like pulling a weed and more like trying to remove a very long, invisible network without missing any segment. Second, why shallow barriers fail: rhizomes typically run in the top six to ten inches of soil, so a barrier needs real depth (12 inches minimum) and, just as importantly, needs to be checked, because rhizomes reliably find and exploit any gap, low spot, or point where the barrier doesn’t quite meet the surface.
The only method that fully works: a pot with no soil contact
Every mint-containment technique that involves the ground eventually fails, because it only takes one missed rhizome to restart the whole problem. The reliable fix skips the ground question entirely:
Grow mint in a container, full stop — either freestanding on a patio or deck, or sunk into the garden bed but with the pot’s rim standing proud of the soil surface by at least an inch or two, so no rhizome can simply grow up and over the lip into open ground. A container at least 12 inches across gives the roots real room and reduces how often you need to water; mint tolerates being slightly pot-bound better than many herbs, so it doesn’t need repotting on the same urgent schedule as thirstier plants.
If mint is sunk into a bed this way, check the rim monthly during the growing season for any runner attempting to bridge the gap, and trim it back to the pot immediately. This is the one piece of ongoing vigilance a potted-and-sunk mint asks for; a fully freestanding pot on a hard surface needs none of it.
What doesn’t reliably work, despite being common advice: burying a bottomless bucket or pot around mint planted in the ground. It slows the spread for a season or two, but the barrier is rarely deep enough, rhizomes eventually find the bottom edge or grow up and over the rim exactly like the sunk-pot method above — except without anyone checking, since the whole point of that method was avoiding maintenance. If you want mint in the ground, plan on it winning eventually; if you want mint contained, the pot needs a solid bottom and clean air gap above the soil line, not a bottomless barrier below it.
Alt: Mint pot sunk into garden bed with rim raised above soil to prevent rhizomes from spreading
Caption: Sunk for looks, raised for containment — the rim is doing all the work.
Choosing and growing mint once it’s contained
Mint’s care, once containment is handled, is almost embarrassingly easy — closer to a houseplant on autopilot than a fussy herb:
- Light: part sun to part shade; mint appreciates some afternoon shade in hot climates, unlike the full-sun Mediterranean herbs (rosemary, thyme) covered in our herb garden guide.
- Soil: any decent potting mix; mint is famously unfussy and grows in soil that would disappoint fussier plants.
- Water: more than the Mediterranean herbs — mint wilts dramatically when the pot dries out, though it usually recovers fully within an hour of a good soak. Containers need checking more often than in-ground beds, especially in summer heat.
- Feeding: light, occasional feeding (a diluted balanced liquid fertilizer monthly in the growing season) keeps leaves lush; mint in nutrient-poor mix gets thin and less flavorful over time.
Choosing a variety is mostly about flavor, since all mints share the same growth habit and containment needs: peppermint for the classic sharp, cooling flavor (best for tea); spearmint for a gentler, sweeter profile (the standard for mojitos and culinary use); and specialty types like chocolate mint or apple mint for novelty and dessert pairings. Buy a small plant rather than starting from seed — mint seed is slow and often produces variable, less flavorful offspring, since cultivated mints are largely hybrids that don’t come true from seed.
Harvesting: the maintenance that keeps it productive
Regular harvesting is mint’s version of pruning, and it directly improves the plant rather than just supplying the kitchen:
- Pinch stem tips just above a leaf pair, the same technique used on basil — each cut forks the stem into two, building a bushier plant with more usable growth.
- Harvest before flowering for the best flavor; once mint flowers (small white or purple spikes, much loved by bees), the leaves turn slightly bitter and the plant’s energy shifts toward seed production.
- Cut hard in midsummer if the plant gets leggy or sparse in the center — mint tolerates being cut back by half without complaint and regrows fresh, dense growth within two to three weeks.
- Overwinter outdoor pots by moving them somewhere sheltered in cold climates, or simply accept that mint dies back to the roots in winter and returns reliably from a hardy rhizome crown each spring — it’s perennial to about zone 3, tougher than almost anything else in the herb bed.
Reclaiming ground that mint has already invaded
If mint escaped into a bed or lawn before containment measures went in, recovery is possible but takes a season of persistence rather than one afternoon:
- Dig out everything visible. Use a garden fork to loosen the soil broadly around the infested area — well beyond where mint is currently showing above ground — and sift through it by hand, pulling every white or pale rhizome fragment you find. This is tedious and worth doing thoroughly; it’s the step most people rush, and rushing it is why mint “keeps coming back” for years.
- Watch the cleared area for the rest of the season. Any fragment missed in step one will send up a new shoot within a few weeks. The moment you see one, pull it immediately, before it has time to build its own rhizome network — a shoot caught within days of emerging is far easier to fully remove than one that’s had a month to establish.
- For severe infestations, consider solarizing. Covering the cleared soil with clear plastic, sealed at the edges, during the hottest weeks of summer raises soil temperature high enough over four to six weeks to kill most remaining rhizome fragments. It’s a heavy-handed option, appropriate for a bed that’s overrun rather than lightly invaded.
- Replant the reclaimed ground with something else once you’re confident it’s clear, and keep any future mint firmly potted at a distance. A bed that’s had one mint infestation is not more resistant to a second — the lesson has to be structural (containment), not just remedial.
The reframe worth keeping
Mint’s reputation as a garden menace is really a case of the plant doing exactly what it evolved to do — spreading efficiently and persistently — in a context (a mixed garden bed with other, more polite plants) it was never suited for. Give it the context it wants — its own contained pot, harvested regularly, watered generously — and mint stops being a cautionary tale and becomes one of the lowest-effort, highest-reward plants in the whole garden. The only rule that matters is the one everyone learns the hard way: never let it touch open soil.
Frequently asked questions
Why is mint so invasive compared to other herbs?
Mint spreads through underground stems called rhizomes that grow horizontally and sprout new plants at each node, independent of seeds or flowers. A single mint plant in loose garden soil can send runners several feet in a season, and any severed piece of rhizome left behind can regrow into a whole new plant — which is why pulling mint by hand often makes the problem worse.
Can I plant mint directly in the ground if I bury a pot around it?
Only partially, and only for a while. Sinking a bottomless pot or barrier around mint's roots blocks lateral spread for a season or two, but rhizomes reliably find their way over the rim or through any gap, and few gardeners maintain the barrier's depth (at least 12 inches) or check it often enough. A pot with no direct soil contact is the only fully reliable method.
How do I get rid of mint that's already spread through my garden?
Dig up as much of the root system as you can find, sifting the soil for any rhizome fragments (each one can resprout), then monitor the area for new shoots for a full growing season, pulling any that appear immediately before they establish. Persistent infestations sometimes need a season of solarizing the soil (covering with clear plastic in summer heat) or repeated cutting-to-exhaustion to fully clear.
Does mint in a pot need different care than mint in the ground?
Mostly just more attentive watering — pots dry out faster than garden soil, and mint wilts quickly when thirsty (though it recovers fast once watered). Otherwise the care is identical: part sun to part shade, average soil, and regular harvesting to keep it bushy rather than leggy.
Can different mint varieties cross-pollinate or mix flavors in one pot?
Mints do cross-pollinate readily and hybridize in the garden over generations, which is actually how many named varieties (like peppermint, a natural spearmint-watermint hybrid) originated. In a single season in one pot, though, the flavor of each plant stays true — cross-pollination affects future seeds, not the current plant's leaves.
Will mint spread into my lawn if planted nearby?
Yes, readily — mint's rhizomes don't respect lawn edges any more than garden bed edges, and mowed mint simply grows lower and denser rather than dying back. Keep any in-ground mint at least several feet from lawn edges, or better, keep it potted entirely if a lawn border is nearby.
Is it true that mint repels pests in the garden?
The evidence for mint deterring specific pests (like aphids or cabbage moths) when interplanted is mixed and mostly anecdotal rather than confirmed by controlled research. What mint reliably does is attract pollinators and beneficial insects when it flowers, which offers real indirect pest-control value — but that benefit doesn't require or justify planting it directly in the ground.