No-Dig Gardening: How It Works and How to Start a Bed
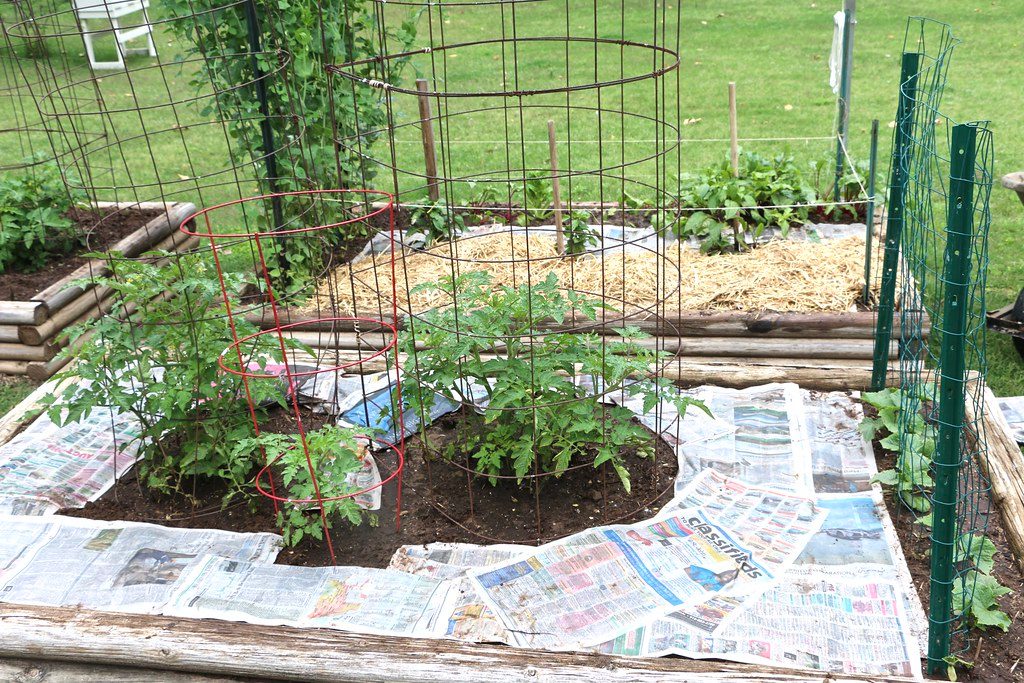
For most of gardening history, the first step in making a new bed was the same everywhere: dig, till, or turn the soil over, breaking it up to loosen it before planting. No-dig gardening quietly rejects that assumption, arguing that the digging itself does more harm than good — disrupting soil structure that took years to build, waking a bank of dormant weed seeds, and doing mechanically what soil life, given the right materials, would happily do on its own. Instead, everything goes on top: compost, mulch, organic matter, layered onto the surface and left for earthworms, fungi, and bacteria to work into the ground below.
It sounds almost too passive to work, and yet gardeners who’ve made the switch — sometimes after decades of tilling every spring — often report less weeding, better soil structure, and beds that improve rather than plateau year over year. This guide covers the reasoning behind it, exactly how to build a bed without ever putting a shovel into the existing ground, and what ongoing maintenance looks like.
Why skipping the dig works
Tilling has an obvious short-term appeal: freshly turned soil looks loose, dark, and ready to plant. The less obvious cost shows up over repeated seasons. Every pass of a tiller or spade shatters the soil aggregates — the crumbly clumps, held together by fungal threads and microbial glues, that create the air pockets roots and water both depend on. Break those apart repeatedly and soil structure degrades rather than improves, sometimes forming a compacted layer just below tilling depth that’s harder to fix than the original problem.
Tilling also disturbs the weed seed bank. Most garden soil holds thousands of dormant weed seeds at various depths, many of which need light exposure to germinate. Turning the soil over reliably brings a fresh batch to the surface every single time, which is a large part of why tilled gardens seem to need endless weeding — the weeding itself is partly self-inflicted by the tilling.
No-dig gardening works with these same mechanisms in reverse. Adding organic matter to the surface — rather than mixing it in — leaves existing soil structure and the buried weed seed bank both undisturbed, while feeding the earthworms and soil organisms that do the actual incorporation work over time, gradually building the same loose, fertile structure a tiller creates instantly and destroys just as quickly.
Building a no-dig bed from scratch
The classic no-dig starting method converts almost any surface — lawn, weedy ground, even fairly compacted soil — into a plantable bed without turning a single spade of earth:
- Mow or cut down existing growth as low as reasonably possible. You’re not removing it, just knocking it back so the next layer sits flush against the ground.
- Lay overlapping sheets of plain cardboard directly on top of the cut growth — overlapping by several inches at every seam so no light reaches through to the grass or weeds beneath. Remove tape, heavy glossy printing, and any plastic-coated sections first, since these don’t break down the same way plain cardboard does.
- Water the cardboard thoroughly to help it settle against the ground and begin softening.
- Pile at least 4 to 6 inches of compost, or a mix of compost and other organic matter, directly on top of the cardboard. This becomes the immediate growing medium — plant roots live in this layer while the cardboard beneath slowly smothers and breaks down whatever was growing there originally.
- Plant directly into the compost layer. Transplants with a reasonably developed root system can generally go in right away; very fine direct-sown seeds sometimes do better if the layer settles for a couple of weeks first.
This is essentially the same method described in our garden startup guide as the lazy-but-effective way to break new ground, and the raised bed guide as a way to fill a new frame — no-dig is the underlying philosophy connecting both.
Alt: Cardboard laid over lawn with compost being added on top to build a no-dig garden bed
Caption: Every step happens from the surface down — nothing beneath the cardboard gets touched, and it doesn't need to be.
What happens to the grass and weeds underneath
The cardboard’s job is to block light, and without light, grass and most weeds beneath it die back within a matter of weeks to a couple of months, depending on the season and what was growing there. As they decompose, they contribute organic matter to the developing bed — you’re not wasting that biomass, just redirecting it downward instead of hauling it away.
Perennial weeds with aggressive, deep, or spreading root systems (some grasses, certain persistent perennial weeds) can occasionally push through a single cardboard layer or find a gap at an overlapping seam, so a careful, generous overlap at every joint matters more than most people expect on the first attempt. Checking a new bed after a few weeks and reinforcing any spot where growth is pushing through is worth the small effort.
Maintaining an established no-dig bed
Once a bed is producing, ongoing care is almost disarmingly simple: add a fresh layer of compost, roughly an inch or two, to the surface once or twice a year — commonly in fall after the season’s harvest, and again in spring before planting — and otherwise leave the soil alone entirely. No annual tilling, no turning the bed over between plantings, just consistent surface additions.
Over several years, this builds a deep, dark, crumbly topsoil layer, entirely from the top down, with earthworms doing the physical work of incorporating each year’s compost addition into the layers below. Many long-term no-dig gardeners report needing less water, less fertilizer, and considerably less weeding as the years pass — the opposite trajectory of many tilled gardens, which often seem to need more input each year just to maintain the same results.
Mulch plays a supporting role in the ongoing system — a layer of straw, shredded leaves, or wood chips over the compost suppresses the weeds that do arrive from windblown seed, retains moisture, and itself becomes additional organic matter as it breaks down, all covered in more detail in our complete mulching guide.
When a shovel still has a place
No-dig isn’t a rule without exceptions. A few situations call for actual digging or tilling:
- Incorporating a soil amendment that needs to reach depth immediately — lime or sulfur to correct pH per a soil test result, for instance, works faster mixed into the top several inches than waiting for it to migrate down naturally.
- Harvesting root crops like potatoes, which require disturbing the soil by nature of the harvest itself.
- Breaking up severe, longstanding compaction in soil so dense that surface additions alone would take many years to meaningfully improve it — a one-time loosening with a digging fork (not a rototiller, which does more structural damage) can jump-start the process, after which ongoing no-dig maintenance takes over.
These are occasional, targeted interventions rather than a reason to abandon the approach entirely — even gardeners who use a fork for one of these situations typically return to a no-dig routine for everything else.
Why the patience pays off
No-dig gardening asks for one significant trade: a bit more patience up front, since a fresh cardboard-and-compost bed doesn’t look as dramatically “worked” as freshly tilled earth, and full soil transformation happens over a few years rather than instantly. In exchange, it delivers steadily improving soil structure, less weeding as buried seed banks stay buried, and considerably less physical labor once a bed is established — no annual tilling, no turning, just an annual layer of compost added from a wheelbarrow. For a method built entirely on doing less digging, it’s a compelling case for how much of a garden’s real work can be handed off to earthworms and soil biology, given the right material to work with.
Frequently asked questions
What exactly is no-dig gardening?
A method of building and maintaining garden beds by adding organic matter — compost, mulch, and other amendments — on top of the soil surface, rather than tilling or turning the soil over. It relies on earthworms, soil microbes, and natural processes to incorporate that material downward over time instead of doing it mechanically.
Does no-dig gardening actually work as well as tilling?
Research and widespread grower experience suggest it often works better over time, particularly for soil structure and long-term fertility — tilling provides a short-term burst of aeration but breaks down soil aggregates, disrupts fungal networks, and can worsen compaction over repeated seasons, while no-dig methods build stable structure gradually and tend to need less intervention as years pass.
How do I start a no-dig bed over existing lawn or weeds?
Mow or cut the existing growth low, lay overlapping sheets of cardboard directly on top (removing tape and heavy glossy coating), then pile at least 4 to 6 inches of compost or a compost-and-mulch mix on top of the cardboard. The cardboard smothers the grass and weeds beneath while the compost above provides an immediately plantable growing medium.
Can I plant into a no-dig bed right away, or do I need to wait?
You can often plant the same day, directly into the compost layer, for transplants with reasonably developed roots — the cardboard beneath continues breaking down and smothering weeds while the plant grows in the layer above it. Direct-sown small seeds sometimes do better waiting a few weeks for the compost layer to settle slightly first.
Do I need to weed a no-dig garden?
Considerably less than a conventional tilled bed, since tilling brings buried weed seeds to the surface where light triggers germination, while no-dig leaves that seed bank undisturbed and buried. Some weeding is still needed, particularly from windblown seeds landing on the surface, but most no-dig gardeners report a significant reduction over time compared to their previous tilled beds.
How do I maintain a no-dig bed once it's established?
Simply add a fresh layer of compost (an inch or two) to the surface each year, generally in fall or spring, rather than digging or turning the bed at all. Over years, this builds a deep, dark, crumbly topsoil layer purely from surface additions, with earthworms and soil life doing all the incorporation work.
Is no-dig gardening the same as raised bed gardening?
Related but distinct — a no-dig bed can be built directly at ground level with no frame at all, while raised beds specifically use a frame to hold soil above grade. Many gardeners combine both approaches, building a no-dig bed inside a raised frame, but no-dig itself is about the method of soil-building and maintenance rather than any particular structure.