Houseplant Root Rot: Early Signs and How to Actually Fix It
Root rot has a frustrating habit of hiding until it’s already serious. The soil looks fine, the pot looks fine, and then a plant that seemed perfectly healthy a week ago suddenly wilts, droops, or drops leaves — by which point the damage below the soil line has often been building for weeks. Understanding what’s happening underground, and catching the early signals before a plant collapses, is the difference between a quick repot and losing the plant entirely.
What’s happening below the soil
Root rot isn’t caused directly by water itself — plant roots need water to function, obviously. The real problem is oxygen deprivation. Healthy roots need access to air pockets in the soil to respire, and soil that stays saturated for extended periods fills those air pockets with water instead, effectively suffocating the roots. Roots deprived of oxygen for long enough begin to die back, and that dead, weakened tissue becomes an easy target for rot-causing soil fungi — most commonly Pythium and Phytophthora species — that are present in most potting soil at low levels but only become a serious problem once they have dead or dying root tissue to colonize.
This is why root rot is fundamentally a watering and drainage problem dressed up as a disease. The fungi are almost always present already; what changes is whether soil conditions give them dead root tissue to exploit.
The early signs, before leaves show obvious trouble
By the time a houseplant’s leaves are uniformly yellow, wilted, or dropping, root damage is often already fairly advanced — which is exactly why catching earlier signals matters:
- A persistent, sour or swampy smell from the soil, distinct from the neutral or faintly earthy smell of healthy, appropriately moist soil.
- Soil that stays wet noticeably longer than it used to after a normal watering, even without a change in watering amount — a sign that damaged roots are no longer taking up water at their normal rate.
- Wilting despite visibly moist soil — one of the most counterintuitive and telling signs, since a plant owner’s instinct is often to water a wilting plant more, which only compounds the actual problem.
- New growth that emerges stunted, pale, or slow, reflecting a root system that’s no longer able to support normal growth even before older leaves show obvious decline.
- A slight looseness or wobble in the plant’s base within the pot, since decayed roots no longer anchor the plant as firmly as healthy ones do.
Any one of these on its own isn’t necessarily conclusive, but a couple appearing together, especially alongside a watering history on the generous side, is a strong enough signal to check the roots directly before waiting for more obvious leaf symptoms.
How to confirm root rot
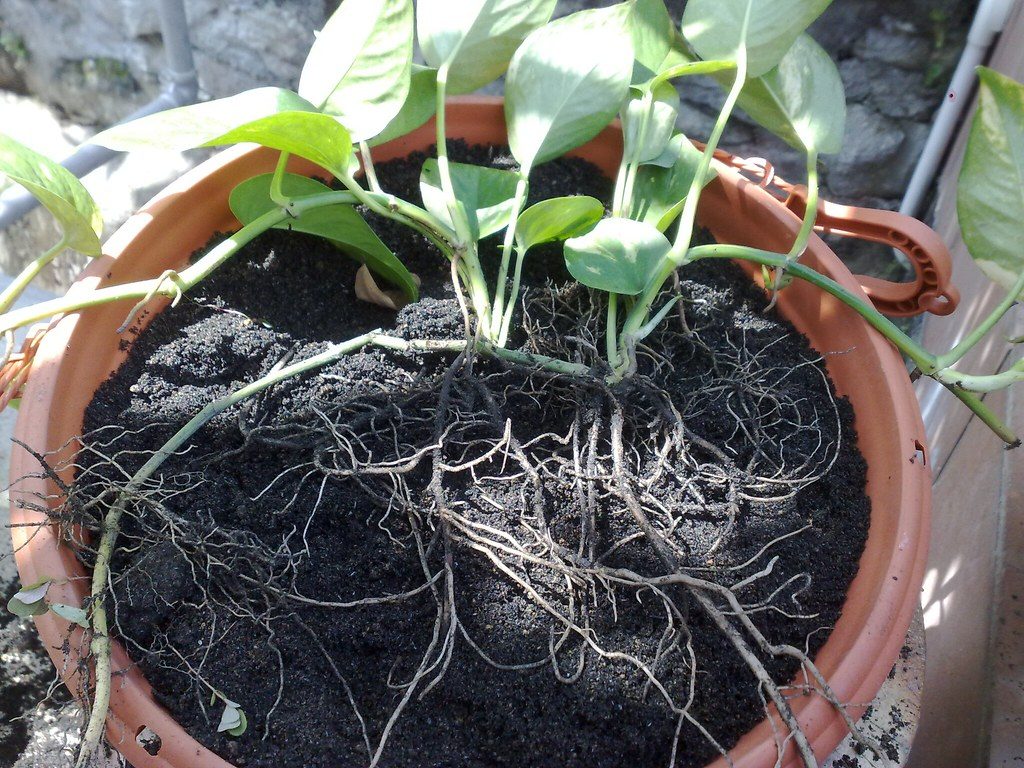
The only fully reliable way to confirm root rot is to look at the roots themselves. Gently remove the plant from its pot — for a plant that hasn’t been repotted in a while, running a butter knife around the inside edge of the pot first helps loosen a root-bound mass without excessive tugging. Once out, gently brush or rinse away enough soil to see the root structure clearly.
Healthy roots are firm to the touch, typically white, light tan, or a healthy pale color depending on species, and hold together well without falling apart under gentle handling. Rotted roots are dark brown to black, soft and mushy rather than firm, and often slip apart or disintegrate with only light pressure — sometimes leaving a dark, slimy residue on your fingers, frequently accompanied by a distinct foul or sour odor that’s noticeably different from healthy soil smell.
It’s common to find a mix of both on the same plant — some sections still firm and white, others clearly blackened and mushy — which is useful information, since it tells you how much healthy root tissue you’re working with for recovery.
The recovery process
If the plant has been caught with at least some healthy root tissue remaining, recovery is achievable:
- Trim away everything rotted, using clean, sharp scissors or pruning shears, cutting back to firm, healthy-looking tissue. Leaving any rotted portion behind risks it continuing to decay and infecting the new growth the plant is trying to establish.
- Disinfect your tools between cuts if you’re working on multiple plants, using rubbing alcohol or a diluted bleach solution, to avoid spreading rot-causing fungi between plants.
- Discard the old soil entirely rather than reusing it — it’s likely harboring the fungal population responsible for the rot in the first place.
- Repot into fresh, well-draining potting mix in a clean pot with functional drainage holes. If reusing the same pot, wash it thoroughly first, ideally with a diluted bleach rinse, before adding fresh soil.
- Water conservatively for the first few weeks after repotting, letting the soil dry out more than usual before the next watering, since a diminished root system can’t take up water at its previous rate and the plant needs time to regrow root mass before returning to a normal watering rhythm.
- Hold off on fertilizing until you see clear signs of new, healthy growth, since a stressed, recovering root system isn’t well positioned to process fertilizer and excess nutrients can add further stress at exactly the wrong moment.
A plant with only a small remnant of healthy root tissue has a real chance at recovery, though it may take weeks to months to regrow enough root mass to support normal top growth again — patience and conservative watering during that recovery window matter more than any product or treatment.
When recovery isn’t realistic
If nearly all the root tissue is dark, mushy, and falling apart, with only the barest remnant of firm tissue left, the honest odds of recovery are low. In cases like this, it’s sometimes worth checking whether any healthy stem or crown tissue remains that could be propagated fresh — for plants that root readily from cuttings, starting over from a healthy cutting can salvage the plant genetically even when the original root system is beyond saving. For plants that don’t propagate this way, or where no healthy tissue at all remains, it’s reasonable to treat the loss as a lesson in watering habits for the next plant rather than a rescue mission worth extensive effort.
Which plants are most vulnerable
Root rot risk isn’t distributed evenly across houseplants — it tracks closely with how much drying out between waterings a species naturally tolerates. Succulents, cacti, and other plants adapted to naturally dry or well-draining conditions — snake plants and succulents among the most common examples — are the most frequent root rot victims in home collections, precisely because their native tolerance for drought makes them easy to accidentally overwater relative to their actual needs, especially when kept in a standard, moisture-retentive potting mix rather than a fast-draining one formulated for their type.
Plants that prefer consistently moist soil — many ferns, peace lilies, and similar moisture-loving houseplants — are comparatively more forgiving of a wetter routine, though even these aren’t immune once soil stays saturated for so long that oxygen runs out at the root zone. The practical takeaway is that “how much water does this specific plant want” matters more than any universal watering rule, and mismatching a drought-tolerant plant with a wet-loving watering routine is one of the most common, avoidable root rot setups in a mixed houseplant collection.
Does simply letting the soil dry out fix it?
A common but incomplete piece of advice is to simply stop watering and let an overwatered plant’s soil dry out fully, on the theory that this alone reverses the damage. Drying out the soil does stop further damage from occurring and is a necessary first step — but it does nothing to reverse rot that’s already set into the root tissue, since dead and decaying root cells don’t recover just because the surrounding soil dries out. A plant with actual rot present still needs the roots physically inspected and trimmed, and ideally a fresh, well-draining repot, rather than relying on drying out alone to solve a problem that’s already progressed past the “too much water” stage into actual tissue death.
A preventive drench for at-risk plants
For a plant that’s shown early warning signs but where root inspection reveals mostly healthy tissue with the infection caught very early, a diluted hydrogen peroxide soil drench — the same one to four parts water dilution used for fungus gnat larvae — can help knock back an early, localized fungal presence in the soil before it spreads further, since hydrogen peroxide’s oxidizing action affects rot-causing fungi in the soil much the same way it affects gnat larvae. This is a supportive measure best used alongside — never instead of — correcting the watering habit and improving drainage, since it does nothing to address the underlying moisture conditions that let the fungi take hold in the first place.
Preventing root rot before it starts
Since root rot is fundamentally a drainage and overwatering problem, prevention comes down to a small number of consistently applied habits:
- Always use pots with functional drainage holes. A decorative outer pot without drainage is fine as a cachepot, as long as the actual growing pot inside it has drainage and isn’t left sitting in collected water in the bottom of the outer pot.
- Water based on actual soil moisture, checked by inserting a finger an inch or two into the soil, rather than on a fixed calendar schedule regardless of how the plant’s specific needs vary with season and light.
- Match the potting mix to the plant. A succulent or cactus in a standard, moisture-retentive potting mix is set up for root rot from the start; a fast-draining mix formulated for that plant type addresses the risk before watering habits even come into play, a principle covered further in our guide to container drainage.
- Empty saucers and cachepots after watering rather than letting a plant sit in standing water for hours or days, since this is one of the most common and easily avoided causes of chronic root saturation.
Root rot is one of the more forgiving houseplant problems when caught early — a plant with a decent remaining root system, repotted promptly into fresh, well-draining soil with a corrected watering habit, often bounces back within a matter of weeks. The real skill is catching it at the “soil smells a little off” stage rather than waiting for the “leaves are collapsing” stage, since that gap is exactly where the difference between an easy save and a lost plant usually lies.
Frequently asked questions
What causes root rot in houseplants?
Root rot is almost always caused by soil staying wet for too long, which starves roots of oxygen and creates ideal conditions for rot-causing fungi like Pythium and Phytophthora to take hold. The excess water itself doesn't directly kill roots — it's the oxygen deprivation and resulting fungal infection that does the damage.
What are the earliest signs of root rot?
Early signs are often visible in the soil and pot before the leaves show obvious trouble — a persistently wet smell, soil that stays soggy far longer than it used to after watering, and a plant that seems to wilt despite consistently moist soil are all early red flags. By the time leaves yellow and droop uniformly, root damage is often already fairly advanced.
How do I check if my plant has root rot?
Gently remove the plant from its pot and examine the roots directly — healthy roots are firm, typically white or light tan, and hold together well. Rotted roots are dark brown to black, mushy, and often slip off in your fingers or fall away from the plant with minimal pressure, sometimes accompanied by a distinct foul, sour smell.
Can a plant recover from root rot?
Yes, if caught before damage is too extensive — trimming away all visibly rotted roots, repotting into fresh, well-draining soil in a clean pot, and correcting the watering habit that caused the problem gives a plant a genuine chance to regrow healthy roots. A plant with almost no healthy root tissue remaining has a much lower chance of recovery, though it's often still worth attempting with any salvageable stem or crown tissue.
Should I cut off all the rotted roots before repotting?
Yes — any root tissue left rotted will continue to decay and can spread infection to the new, healthy growth the plant is trying to establish. Using clean, sharp scissors or shears to trim away everything dark, mushy, or foul-smelling, leaving only firm and healthy-looking root tissue, gives the repotted plant the best chance of the new soil staying uncontaminated.
Does a pot without drainage holes cause root rot?
It significantly increases the risk — a pot without drainage has no way for excess water to escape, so any overwatering pools at the bottom and keeps the lowest roots sitting in standing water indefinitely. Pots with drainage holes, paired with appropriate watering, are one of the single most effective preventive measures against root rot.
How do I prevent root rot from coming back?
Water based on actual soil moisture checked by hand rather than a fixed schedule, use pots with real drainage holes, and choose a well-draining potting mix appropriate to the specific plant. These three habits address the underlying cause of nearly all root rot cases and are far more effective long-term than treating each individual episode after it's already happened.